
Calendar Month View
| Parameters | Description | |
| Choose Calendar View Type | There are multiple calendar options to choose from. Calendar Month View: This is a typical basic calendar. Vertical Calendar Month View: This is a type of calendar which shows the days of the month listed vertically. Single Day Hours View: This is a type of calendar which divdes the day into one hour time slots. Resource Planning Views: See section for Parameters for Resource Planning below. | |
| Select Bloc | Select the bloc in which you want to use data from. | |
| Select Start Date/Time Field | This is the date from which the calendar will begin. You must create a Date/Time Selector field within the same bloc. This needs to be customized based on the Calendar View Type that you select in your Calendar & Resource Planning field. For example, if you picked the standard Calendar Month View, then a Date/Time Selector with just a date would be sufficient. However, if you choose a Calendar View Type such as a Resource Planning View (Days and Hours - Full Week) then your Date/Time Selector Field would also need to include the time. | |
| Select End Date/Time Field | Same logic as above. This is the date (and time if necessary) in which the calendar will run to. | |
| Select Field for Label on the Calendar Item | This is what data appears on the calendar itself. The user can select any field within the bloc. | |
| Choose height of records | The user can can set the height of the item (in PX) which appears in the calendar. |
Calendar Month View

Start/End Date/Time Selector Fields

Records Added
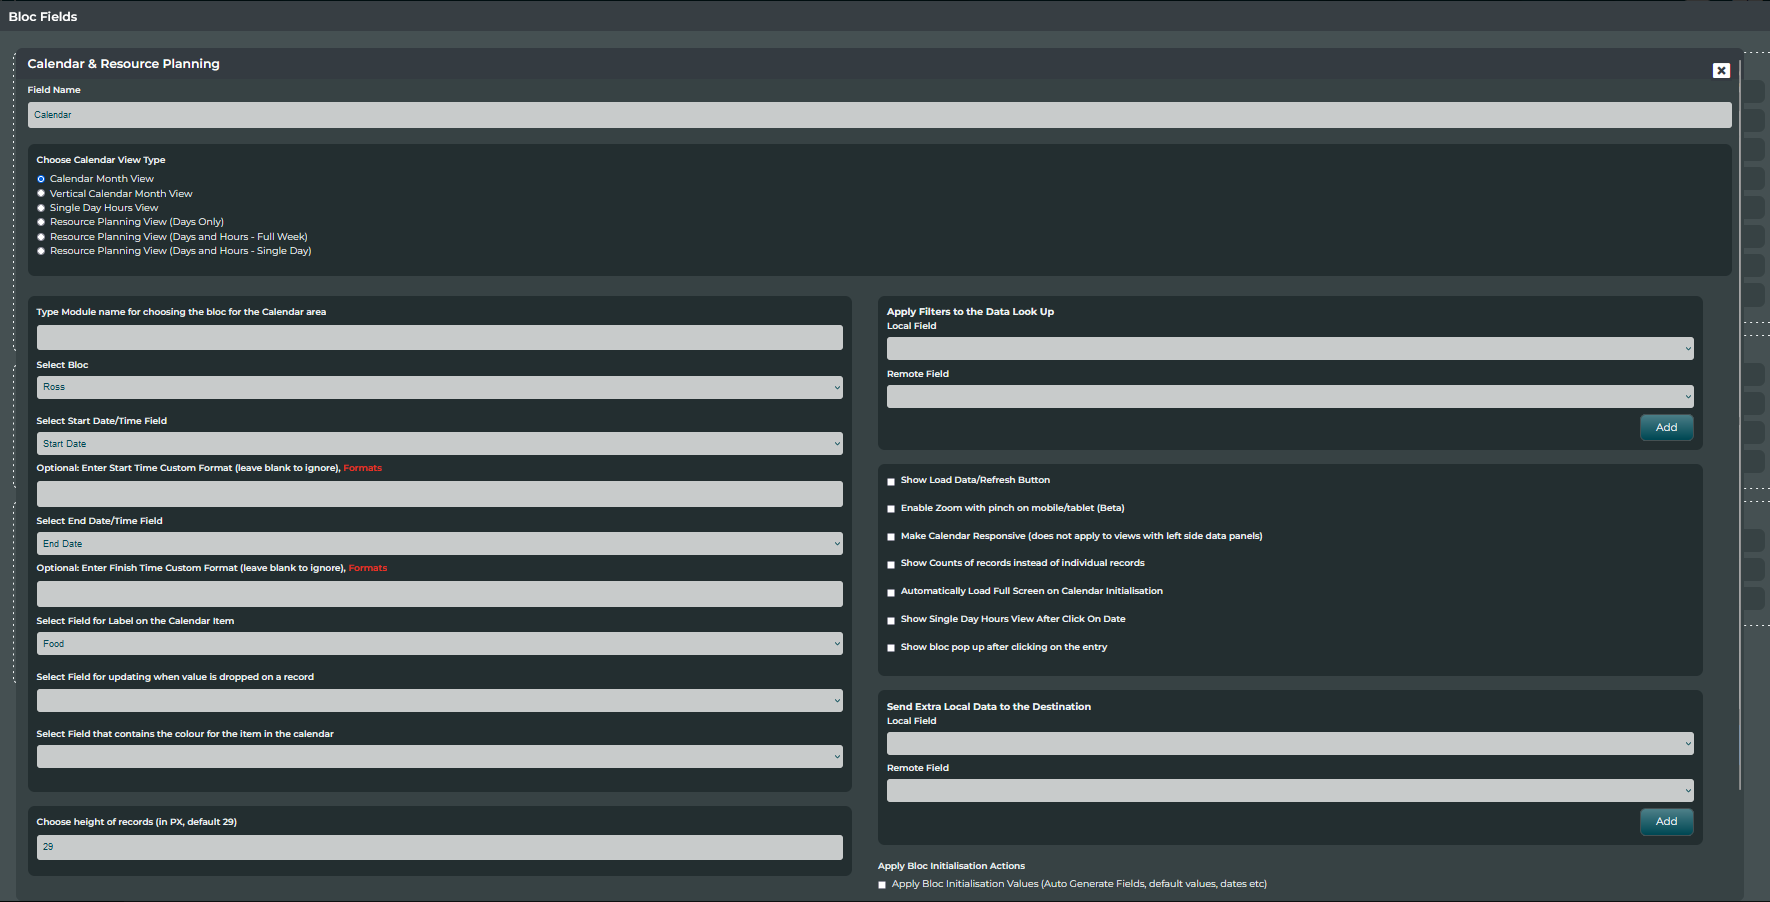
Calendar Field
| Parameters | Description | |
| Choose Calendar View Type | Resource Planning View (Days Only): This is a type of calendar that has days across the top and on the left column you have data. Its similar to a gantt chart. Resource Planning View (Days and Hours - Full Week): Same as above, however its broken into days and hours. Resource Planning View (Days and Hours - Single Day): Same as above, but the planner shows only one day at a time. | |
| Select the local data List field that controls the data on the left | This will show what will be displayed on the left column of the calendar. You will have to create another bloc in the module that will contain records. E.g. task1, task2, task3. In the bloc which contains the resource planner, you will have to create a dropdown from bloc field which will give the user an option to select each task. | |
| Select Field that matches the left hand side values | In your bloc, you will have to create a text field. You must input the value that is selected from your dropdown that controls the data on the left. These values must match. | |
| Select Field that contains the colour for the item in the calendar | Possible for calendar items to be different colours, from the following list:
The selected colour must be inputted into a field text field called "Colour" and then selected from this dropdown parameter. |

Resource Planning View (Days Only)
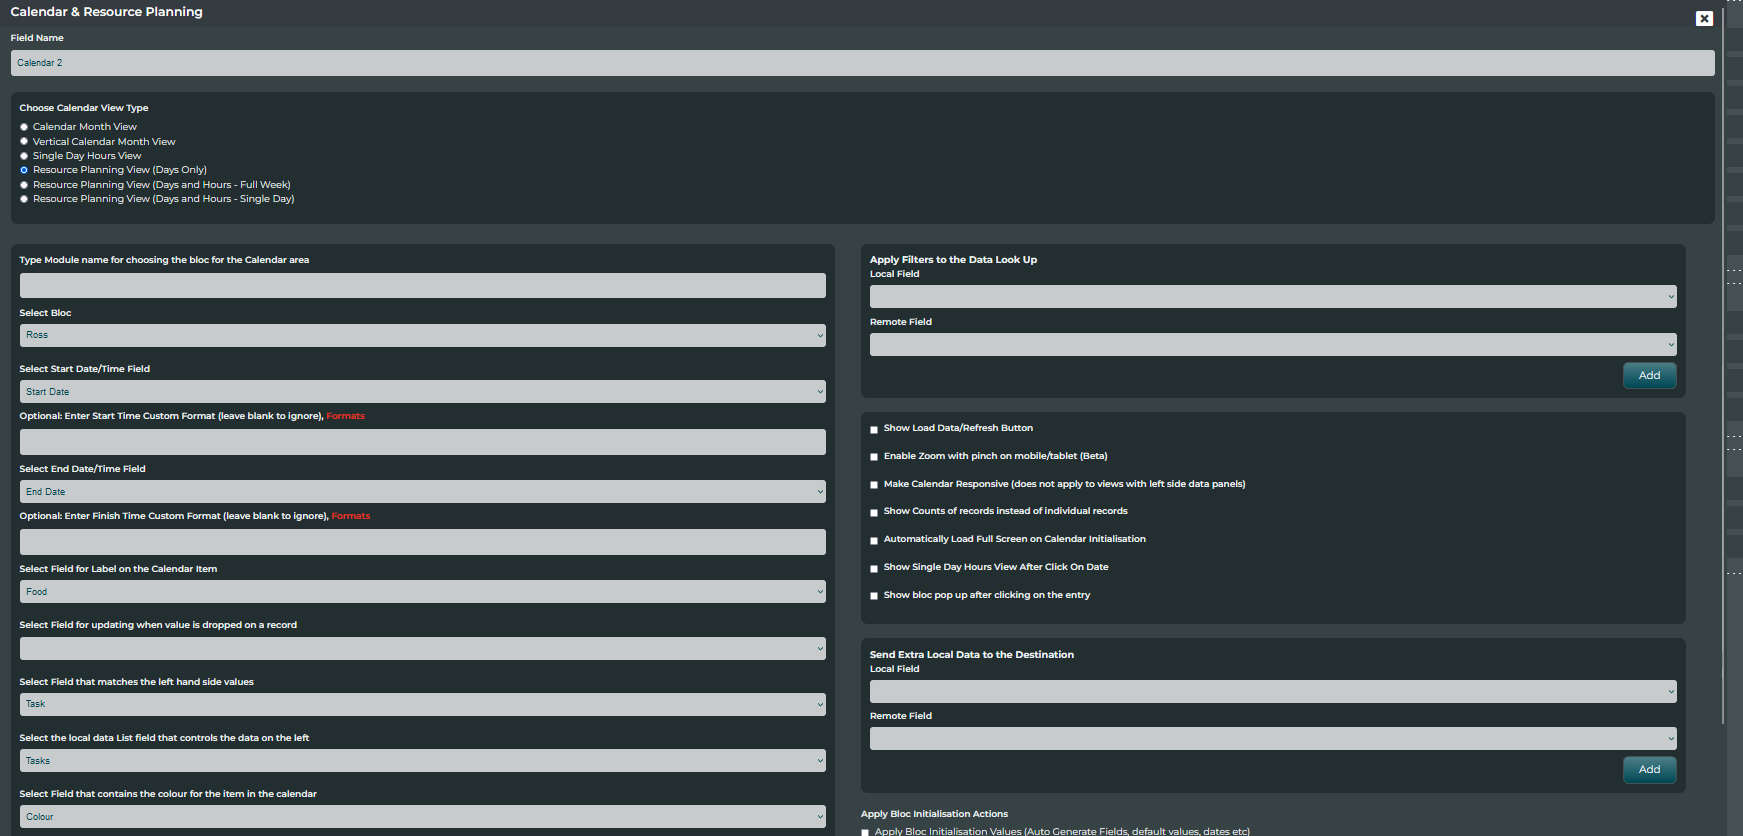
Resource Planner Field

Colour Example

Data to appear on the left column
| Parameter | Description | |
| Enter Start / Finish Time Custom Format | You can use this parameter to decide your own format for Select Start Date/Time This will tell the format what to expect. This can be created using php. See the following link: https://www.w3schools.com/php/func_date_date_format.asp | |
| Select Field for updating when value is dropped on a record | Using this parameter, its possible for a results box to drop data on an existing record and it will update the field in that record with the value you dropped in. | |
| Apply Filters to the Data Look Up | When loading the calendar you can filter to only load matching fields. | |
| Show Load Data/Refresh Button | Enables a button on screen which, when pressed, loads the calendar again. | |
| Enable Zoom with pinch on mobile/tablet (Beta) | Allows user to zoom into calender on mobile with pinch. | |
| Make Calendar Responsive | Makes it responsive on mobile for specific views. | |
| Show Counts of records instead of individual records | Instead of showing the name of an item, it shows the number of records instead. | |
| Automatically Load Full Screen on Calendar Initialisation | Enables full screen mode when bloc loads. | |
| Show Single Day Hours View After Click On Date | Clicking a date in a month or week view drills down into the single day hours view for that date. | |
| Show bloc pop up after clicking on the entry | This gives a pop up of the bloc, of where the data came from. | |
| Send Extra Local Data to the Destination | When you update data on a calendar you can update data in another field after that. You can select the field and the field you want to update. | |
| Apply Bloc Initialisation Actions | See the following documentation for reference: https://manual.blocworx.com/blocworx-documentation/bloc/the-blocworx-process-flow#stage-1-bloc-initialisation | |
| Refresh Calendar Button Text | Customise the label shown on the Load Data / Refresh button. | |
| Show Bloc Pop Up After Clicking on an Entry (Allow Edit) | Opens an editable popup of the source bloc record when a calendar item is clicked. | |
| Show Bloc Pop Up for Adding New Records | When clicking an empty cell, opens the source bloc as a popup for adding a new record instead of the calendar's built-in add dialog. | |
| Show Counts Colour | Sets the colour of the count badges when Show Counts of Records is enabled. | |
| Apply Field Actions (Parameters, Rules, Live Field Activity) | Runs field-level rules and calculations on records created or updated through the calendar. | |
| Apply Pre Submit Data Features (Cross Bloc Updates, Mail Alerts) | Triggers cross-bloc updates and mail alerts when records are created or updated through the calendar. |